Freezers are a safe and easy way to put food away and keep it from going bad. Whether you have a tiny freezer in an apartment or an enormous chest freezer in a basement, you can take advantage of good deals and seasonal produce, batch prep and freeze food, and save your leftovers from the trash. Finding your favorite ways of freezing and organizing food is crucial for making the most out of your space.
Take stock, take inventory
First and foremost, learn a little bit about what kind of freezer you have. Top, bottom, or side placement on the refrigerator can make a big difference in the best way to organize your space, though all the tips that follow will work for any of them. And of course, if you have an upright or chest-style deep freezer, you’ll have much more space to work with.
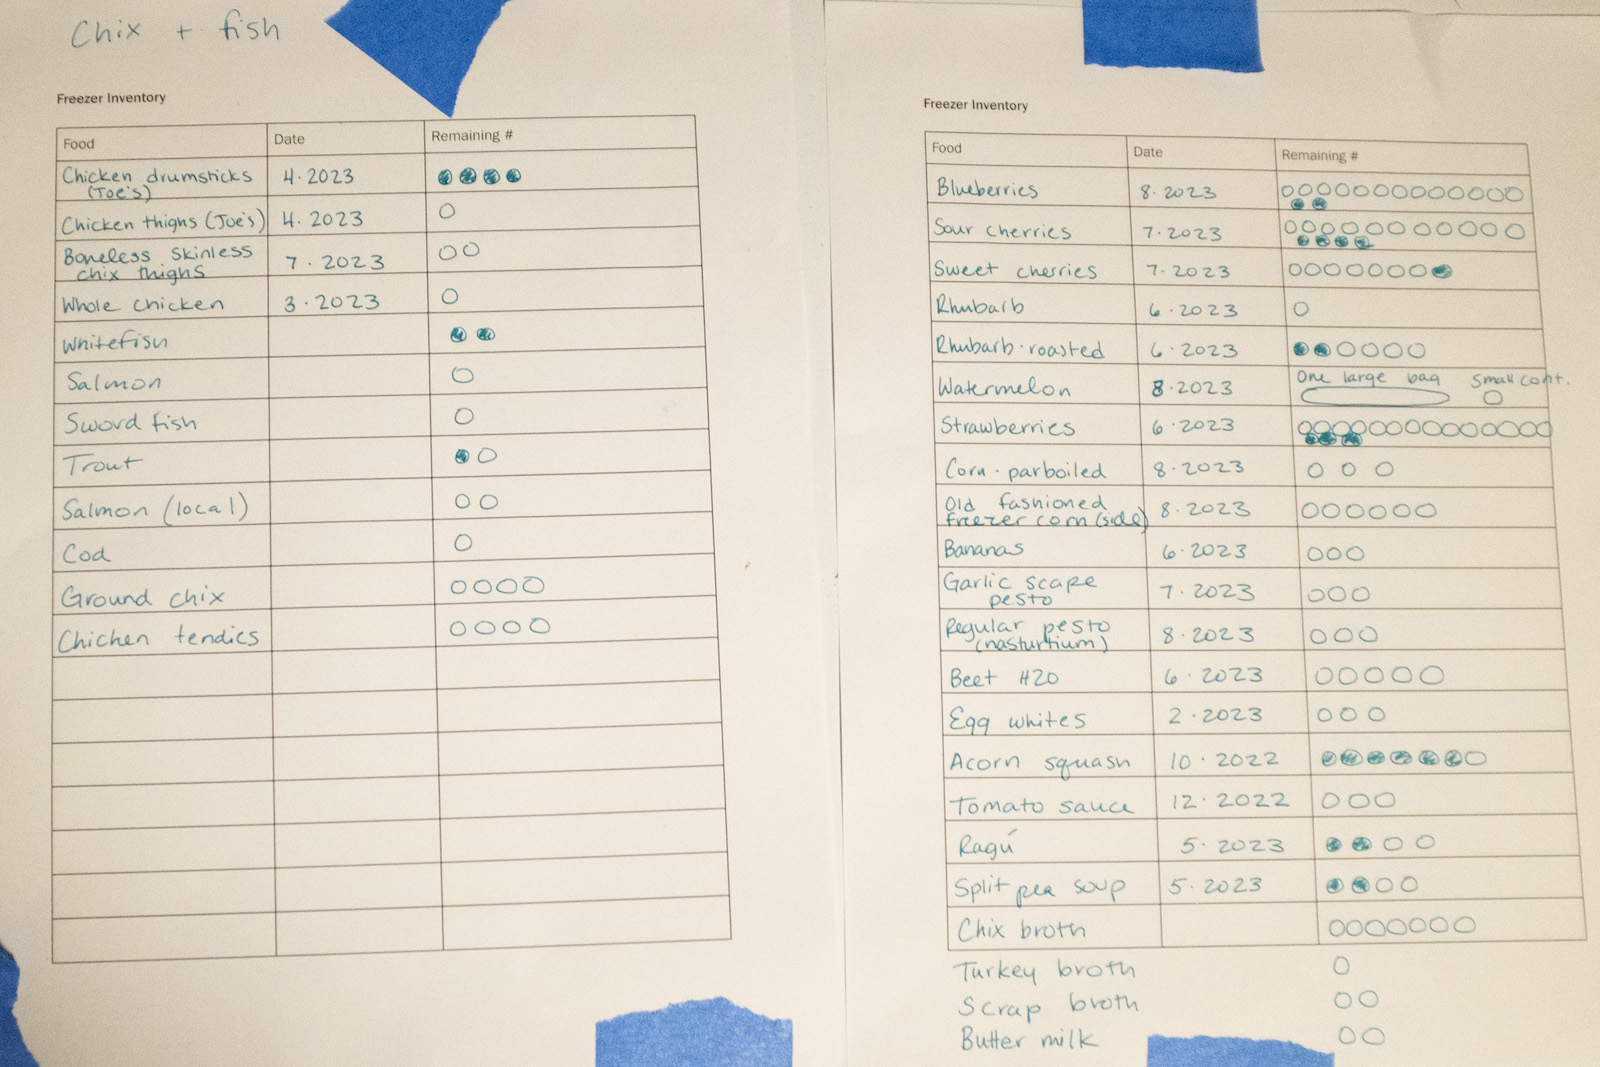
Now you’ll want to take inventory of the items you already have in your freezer(s). If yours is small, Apartment therapy suggests taking inventory right in your freezer with a grease pencil or dry erase marker. Here’s a simple inventory template (make a copy to use it!). I use the system pictured below, where we tape inventory sheets to the top of our chest freezer, and fill in the bubbles for each item as we use it up.

The basics of freezing food
There are tons of pre-made frozen convenience foods out there, but where freezers really shine is allowing you to put away fresh, seasonal, local food. My favorite reference guide, Freeze Fresh, focuses on whole fruits and veggies.
You can batch prep whole meals like soup or veggie patties, or ingredients like broth and sauce. Leftovers at risk of being thrown away can go into the freezer instead. Just keep in mind that not everything freezes equally well. The freezing process especially impacts texture, so some food may not come out quite the same as it went in.
In theory, as long as it’s frozen, food remains good to eat indefinitely. But in practice, food quality degrades over time, so it’s best to eat things up within a year. Include the date that food was frozen on your inventory and on your labels.
Make zones
If you have multiple freezers, think about defining the purpose for each. I have three…one upstairs where we keep items we use every day, like ice cube trays, waffles for breakfast, fruit for yogurt. The freezer downstairs holds ready-made foods like frozen pizzas and ice cream. The chest freezer is where I stash our sustainably sourced meat, local fruit and veggies, and food we make ourselves, like sauces, broth, and batch prepped meals.
Within the freezers, you’ll want to create zones for different food. If you’re working with a smaller freezer space, you can designate certain shelves, drawers, or compartments. But many freezers, especially the upright chest variety, can quickly look like a disorganized toy chest you have to pull everything out of to find one single item. Using bins to organize your food helps keep it together.
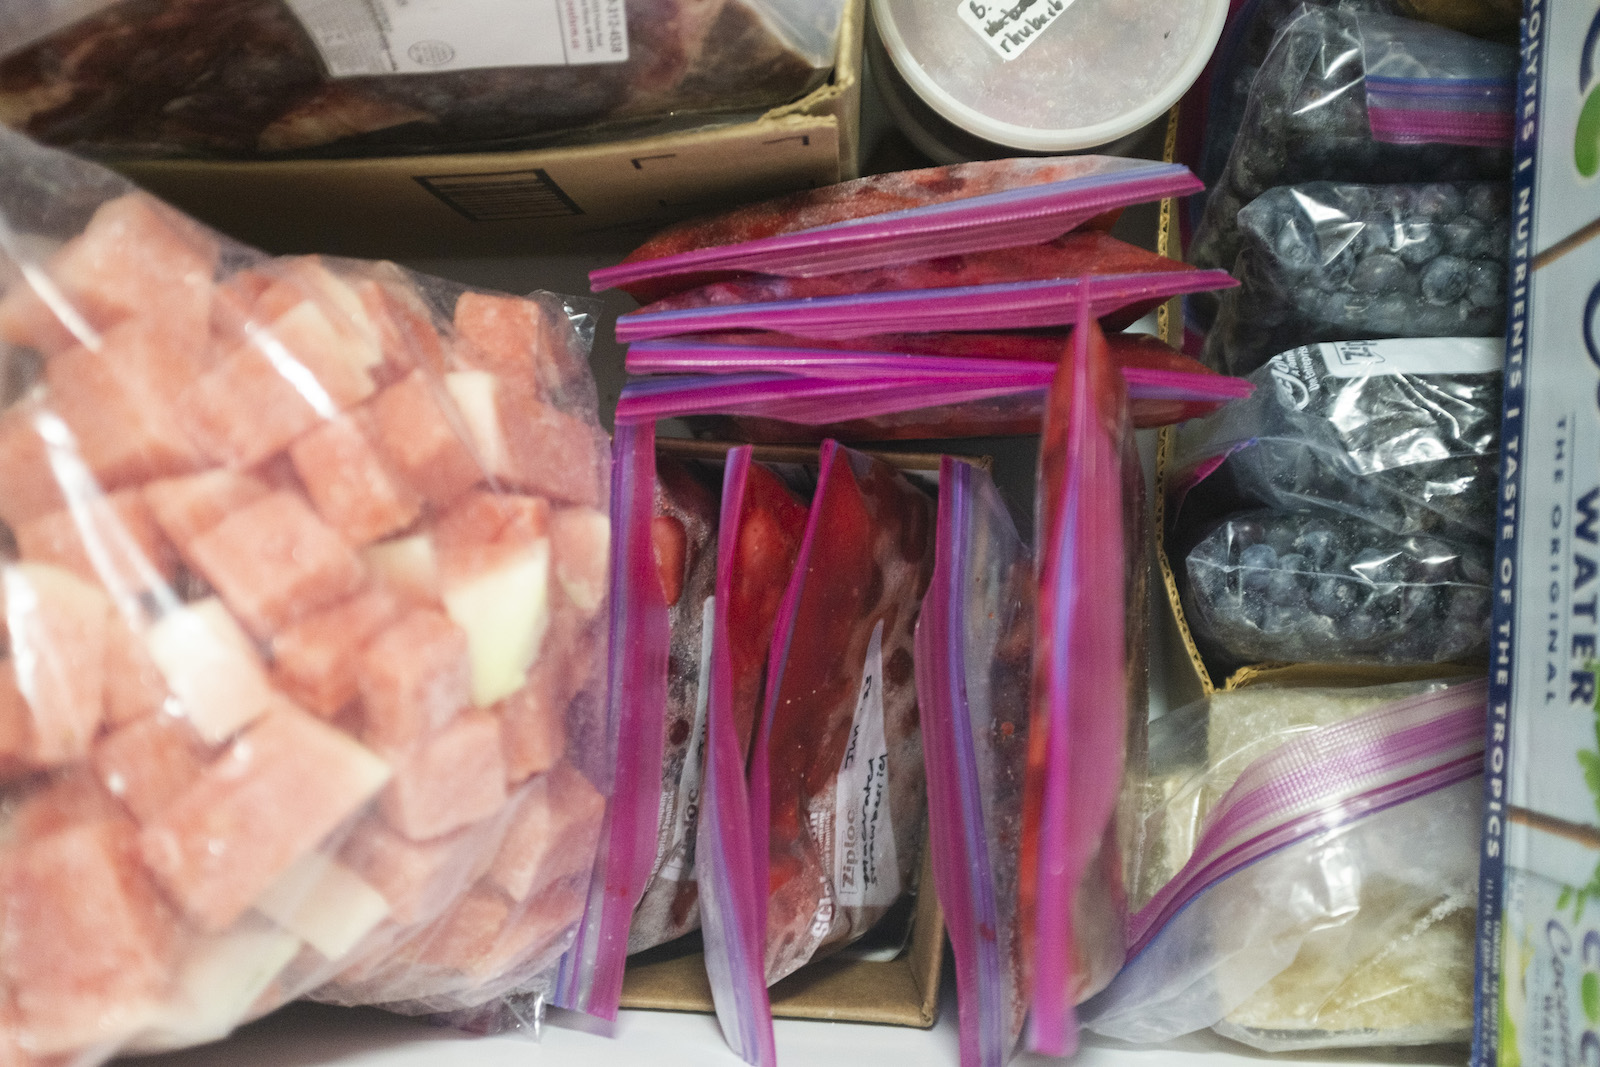
In my freezer, the left hand side is dedicated to meat, with a box for ground beef, one for fish, and one for chicken. The middle includes several layers of shallow boxes stacked on top of each other with fruit and veggies. The right hand side holds soups, sauces, and broths. There are some people who love dollar store bins for this, or you can go super slick with clear handled boxes. I’d love these, but for now I go with the free cardboard boxes and save my budget for canning jars and other fun food preservation projects.

Containers and portions
When you’re putting food away, think about using the right container, shape, and size for the food that you’re freezing, but also for how it will fit in your storage space. Freezing individual portions you’ll thaw as needed will make your life much easier.
If you’re using plastic or silicone bags, once you’ve filled them up, you can lay them flat on a backing sheet to freeze into a convenient shape. Then you can stack them or set them up next to each other like books in a box. For small spaces, Souper Cubes also work great. Larger sizes are good for individual portions of soup, while smaller ones are good for pesto or tomato paste. You’ll freeze your food inside the molds, then once they’re hard, pop the cubes of food out, and put them into plastic baggies for longer-term storage.
For a chest freezer, Reditainers freezer deli containers are great solutions, and can be used over and over again for soups, broth, and veggies. Exercise caution when using glass in your freezer - it can break if it’s not tempered, or if you overfill it. If a container breaks, its contents are rendered unsafe and must be discarded. Make sure whatever containers you’re using are intended for the freezer to avoid freezer burn.
Label and keep up with that inventory
Every item that goes into your freezer should be labeled with the month and year you froze it, and details on what it is. If you’re working with a small freezer, you can save space by removing pre-made foods from cardboard boxes - just make sure those get labeled too! You may also want to label your “zones” in the freezer, especially if lots of different people are taking food out. A label maker can come in handy, or just some masking tape and a marker. I personally like these labels that dissolve in the wash.
Your freezer might get a little messy over time, but staying on top of that inventory helps ensure that things don’t get lost in the frozen abyss. A well organized freezer will help save you time and money - and prevent food waste! Stick with it, and it will become a habit. Leftovers? Pop them in the freezer. Extra veggies you don’t have time to eat? Freeze them!
