
The following post is excerpted from Michelle Balz’s latest book No Waste Composting, available now from Cool Springs Press/The Quarto Group.
Composting in terra-cotta pots has become very popular in India, where urban dwellers want to create compost in small indoor/outdoor spaces, such as a terrace or balcony. This method takes advantage of the breathability of clay to create a beautiful, stackable compost bin.
I will tell you a secret. This composter defies several basic “rules” of composting and by all rights should not work. But it does! The vessels measure four times smaller than most composting containers; it doesn’t rely on organisms from the soil; and the compost stays much drier than I would typically recommend. I tested this rule-breaking composter in my own kitchen and it really does work. The pots even look attractive, and the terra-cotta provides airflow to the composting material to keep it drier and smelling fresh.
One problem you face when you do not have a backyard is a lack of leaves, which normally form the basis of backyard composting methods. When composting in terra-cotta pots, you use a material called cocopeat or coir as your brown carbon source. A by-product from coconut milk and coconut oil production, cocopeat comes from the fibrous coconut husk. It absorbs moisture, provides a source of carbon, and smells nice. Perhaps most important, it’s widely available at a low price at home improvement stores and online.
COCOPEAT ALTERNATIVE
If you live in a corner of the world where cocopeat is not available, you can try other materials, such as sawdust, that would balance the food scraps and absorb excess moisture. In Chile, Mimba Compost uses natural zeolites rather than importing cocopeat.
Because this self-contained composting system does not have access to soil organisms, we will add a compost starter or effective microorganisms to the mix. These will lead to a faster, more controlled decomposition process. However, you could skip this step. Your food scraps are covered in bacteria that will eventually break down the material without help from their store-bought brethren.

Although difficult to find in stores, these beautiful premade terra-cotta composter containers can be found online. Usually artisans handcraft these pots for the purpose of composting and include lovely decorative details. Another bonus of the premade composters is that they come with a generous supply of cocopeat already inoculated with beneficial microorganisms. As you may have suspected, we will go step by step through building your own terra-cotta composter using old garden pots.
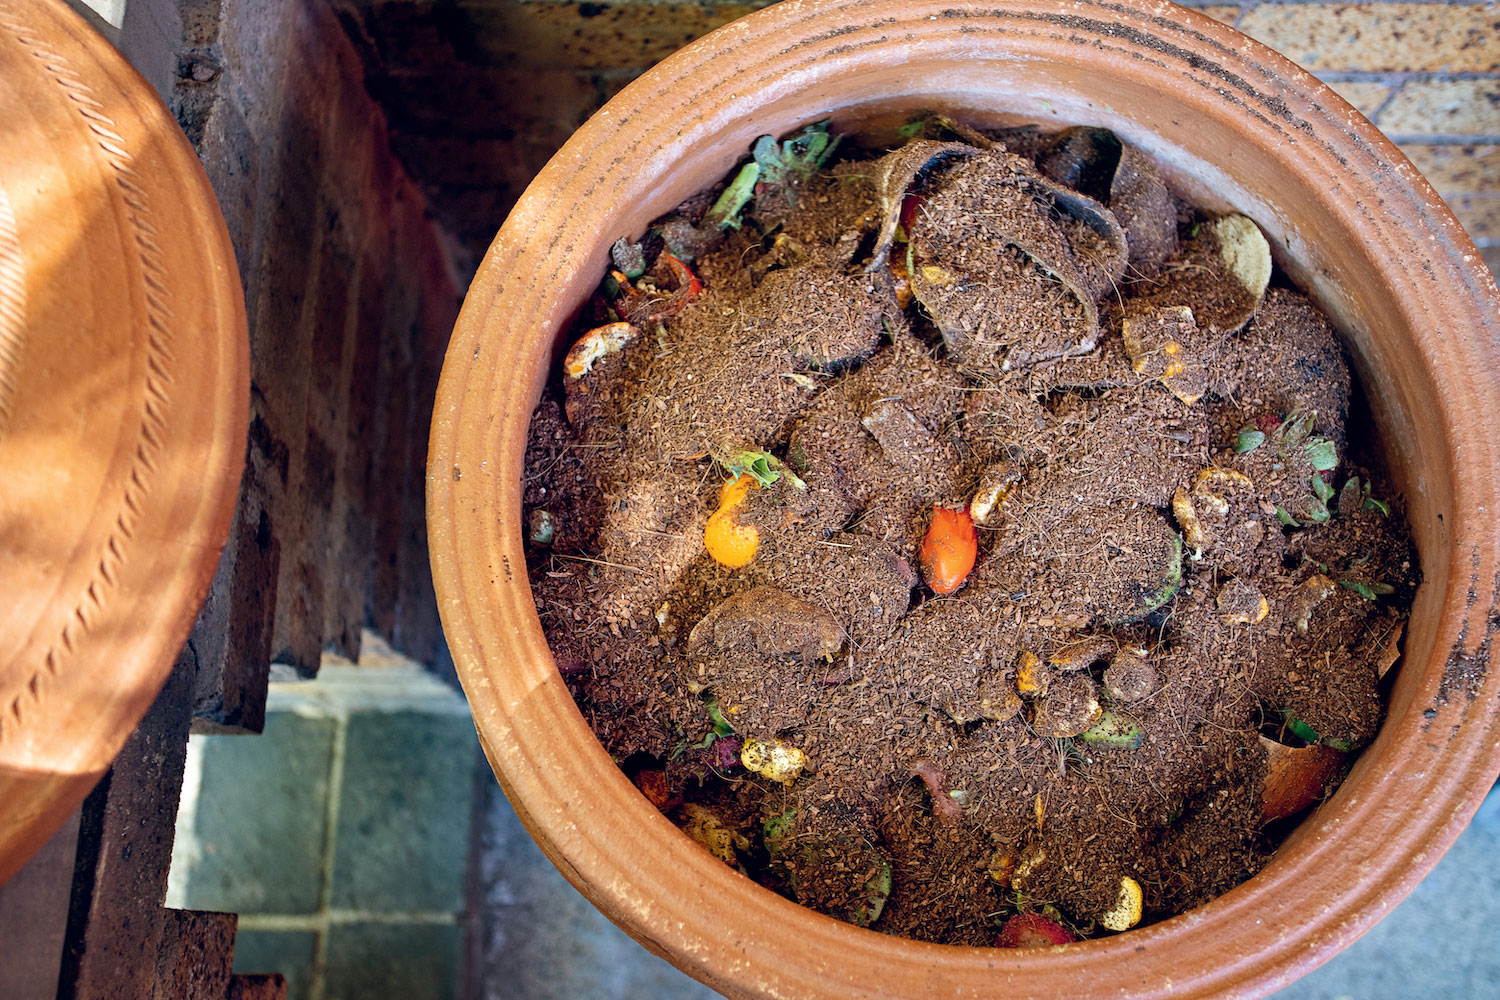
One of these composters lived in a corner of my kitchen for 2 months so I could test what odors it might generate. I carefully covered the food scraps with cocopeat and a layer of newspaper each day and ensured the lid fit tightly in place. It did not smell. At all. However, after 2 months, once the material really started to break down, I moved it onto a covered area of my patio. My primary reason was that decomposition without the aid of worms will inevitably involve mold and I didn’t want my family exposed to mold in an indoor space. I recommend using these composters on a patio, balcony, or porch. Keep it out of the direct rain.
As you fill up the terra-cotta composter, each pot will have material at different stages of decomposition.
Do-It-Yourself Terra-Cotta Composter
The intuitive logic behind terra-cotta composters becomes simple once you stack the pots. You have a base pot and two or three filling pots with a lid on top. The base pot remains intact and always stays on the bottom. This pot stores almost-finished compost and absorbs excess moisture. The other units have holes in the bottom that allow moisture to move between pots.

Materials Needed:
- 3 terra-cotta or clay pots (14 inches [36 cm wide])
- 4 terra-cotta pot saucers (14 inches [36 cm wide])
- Piece of cardboard for templates
- Marker or pencil
- Measuring tape
- Safety glasses
- Drill
- Masonry bit for drill (⅜ inch and 3⁄16 inch) (also called a carbide bit)
- Dust mask
Space Needed:
- Less than 2 × 2 feet (60 × 60 cm)
Time Needed:
- 2 hours
LET’S DO IT: I recommend stacking up your pots to better understand how they will work. If you use old pots with mismatched sizes, use the largest pot at the bottom. This pot will act as your finishing pot with an intact saucer underneath and give the structure stability.
STEP 1: Create a template to drill drain holes for two of the saucers and two of the pots. A cardboard template will make the drilling easier and give you more uniform holes. On our template we drew one hole in the middle with eight holes in a circle around that and then another circle with eight holes around that, or seventeen holes altogether.
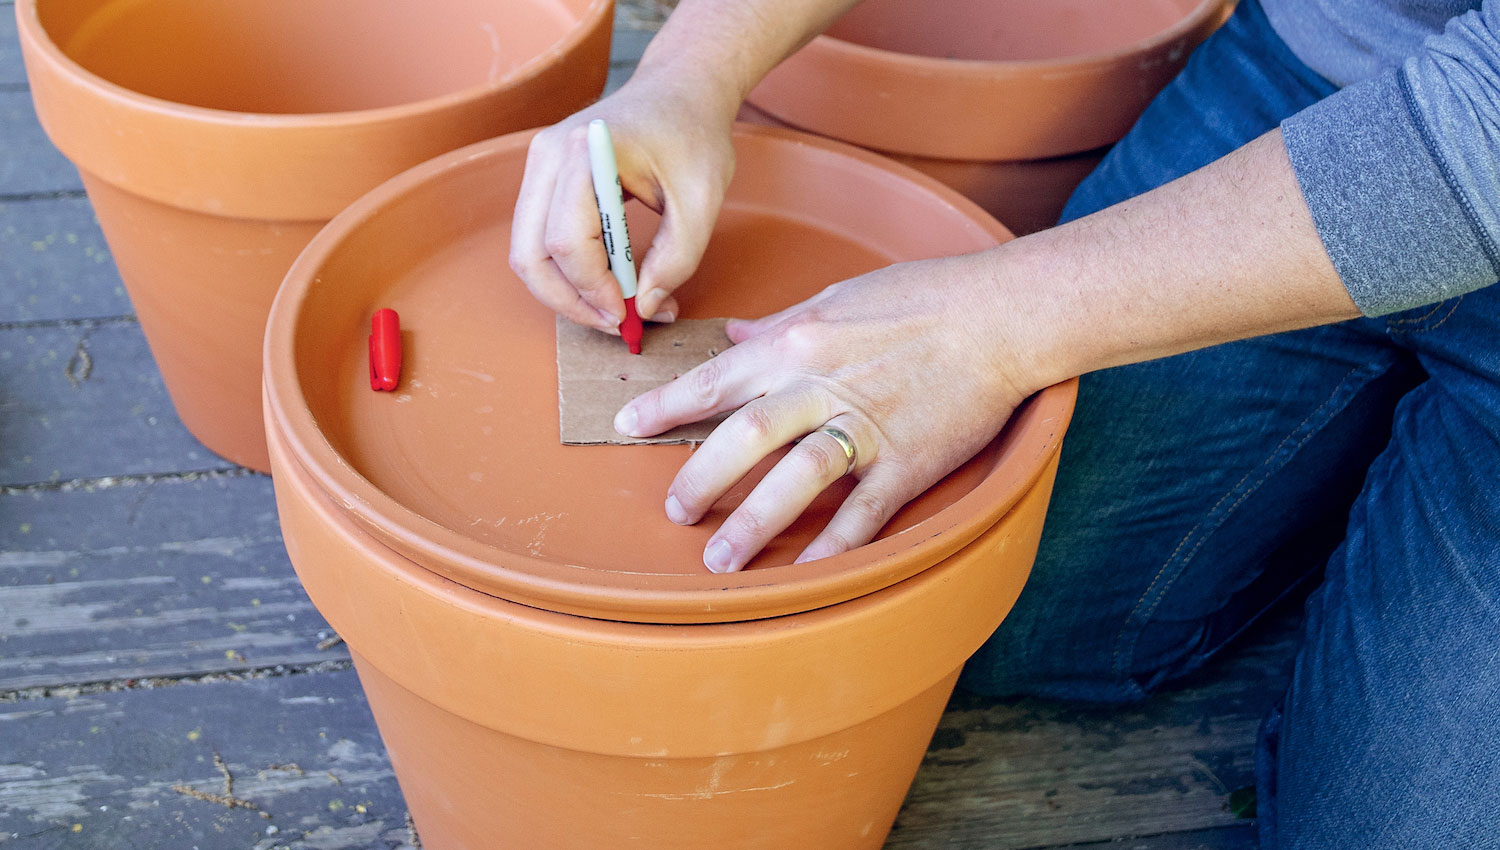
STEP 2: Find the center of your saucer with a measuring tape. Now use your template and a marker or pencil and mark all of the holes on two of the saucers and the bottom of two of the pots. Wearing safety glasses and using the larger or ⅜-inch bit, start by drilling the center hole. Take it nice and easy as this is a very delicate material. This process also creates a lot of clay dust, so be ready with a broom and dustpan. Wear a dust mask while drilling to avoid breathing in the dust.
DRILLING TIPS: Drilling holes in terra-cotta or clay pots can be a little stressful. I think I gasped and held my breath at least a dozen times while making this and I wasn’t even the one doing the drilling. Having the specialized bit for tile and natural stone can make all the difference. If you don’t have that and still want to give the project a go, you can soak the pot in water and use a towel to stabilize the pot. We had no cracks or breaks through, so hopefully you will also have such luck.
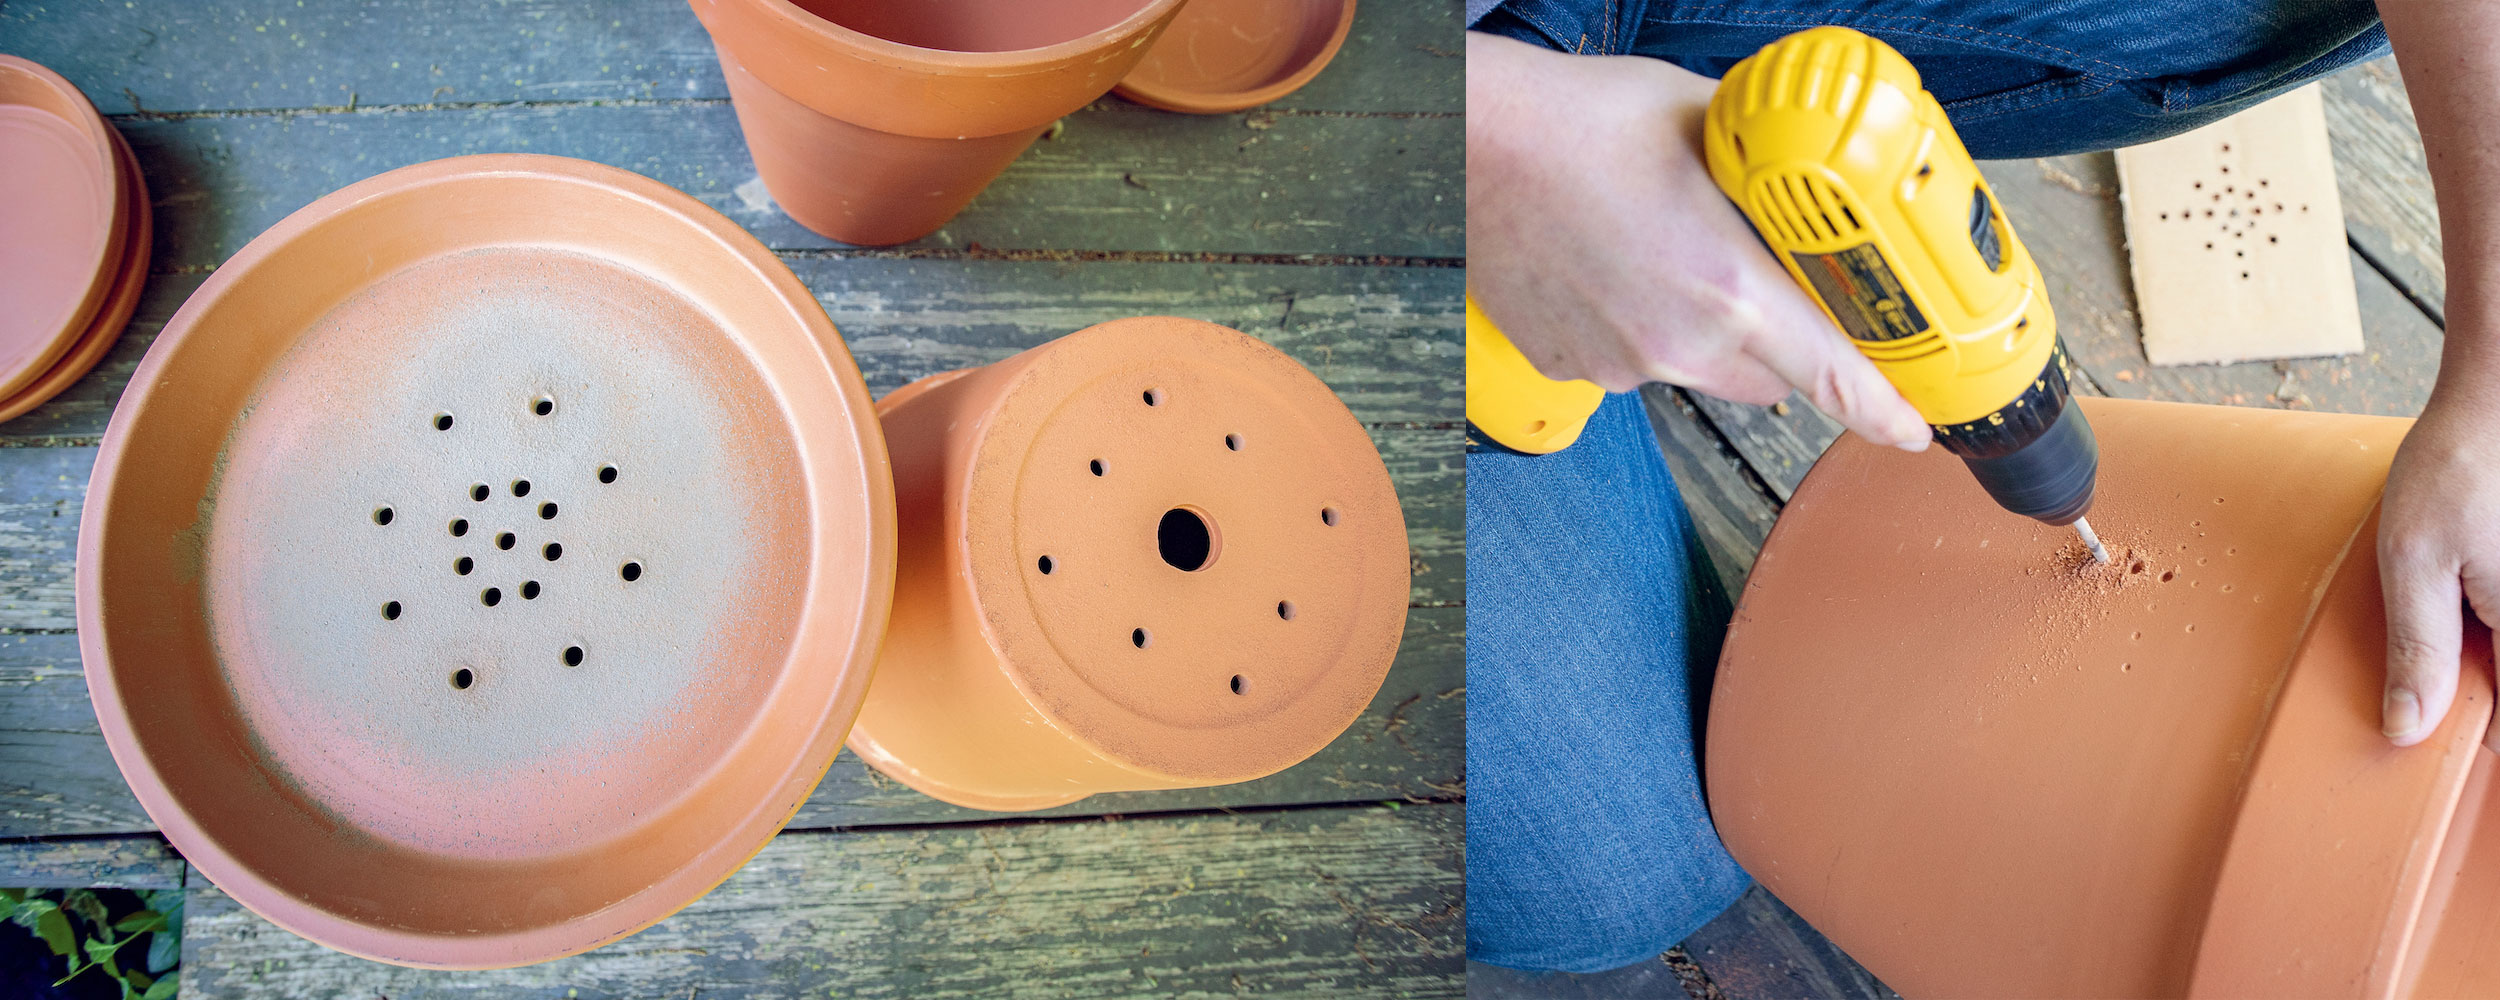
STEP 3: Now use the smaller bit (3⁄16 inch) to drill air holes in the side. I wanted a decorative composter, so my husband created a pretty star pattern with one hole in the center surrounded by twenty holes to create a starburst. Repeat this pattern four times on each pot (you can see how the template makes this much easier) or until you feel like you have a good amount of airflow.
STEP 4: Stack your composting system with one undrilled saucer, the three pots (with the undrilled bottom pot first) separated by two drilled saucers, and an undrilled saucer as the lid.
Start Composting
To start composting, fill the bottom pot with 4 to 6 inches (10 to 15 cm) of dried leaves and a few handfuls of cocopeat to absorb excess moisture. In the top pot, place a layer of newspaper or paper towels, a handful of cocopeat, and a teaspoon of compost starter or effective microorganisms. Add cut-up food scraps no more than once per day and cover with a few handfuls of cocopeat. Coco¬peat should cover the food scraps, so use it generously. Over the cocopeat, cover with a layer of newspaper. If you don’t have access to newspaper, you could use paper towel. When adding new food scraps, peel off the newspaper or paper towel and add food scraps over the top of the layer of cocopeat. Layer again with a covering of cocopeat and reuse the newspaper or paper towel until it starts to disintegrate. Try to keep food scraps very small and avoid lots of cooked vegetables, especially broccoli and cauliflower, since they tend to be smelly to start. Once per week add another teaspoon of compost starter or effective microorganisms.
BRIGHT IDEA
You can purchase compost starter and effective microorganisms at most home improvement stores. Generally, I find these products unnecessary for simple backyard composting because all of the organisms you need naturally live in the soil under your compost. In the case of the terra-cotta composter, however, they do help speed up the process. A little goes a long way with the compost starter, so your bag or bottle should last months, if not a year.
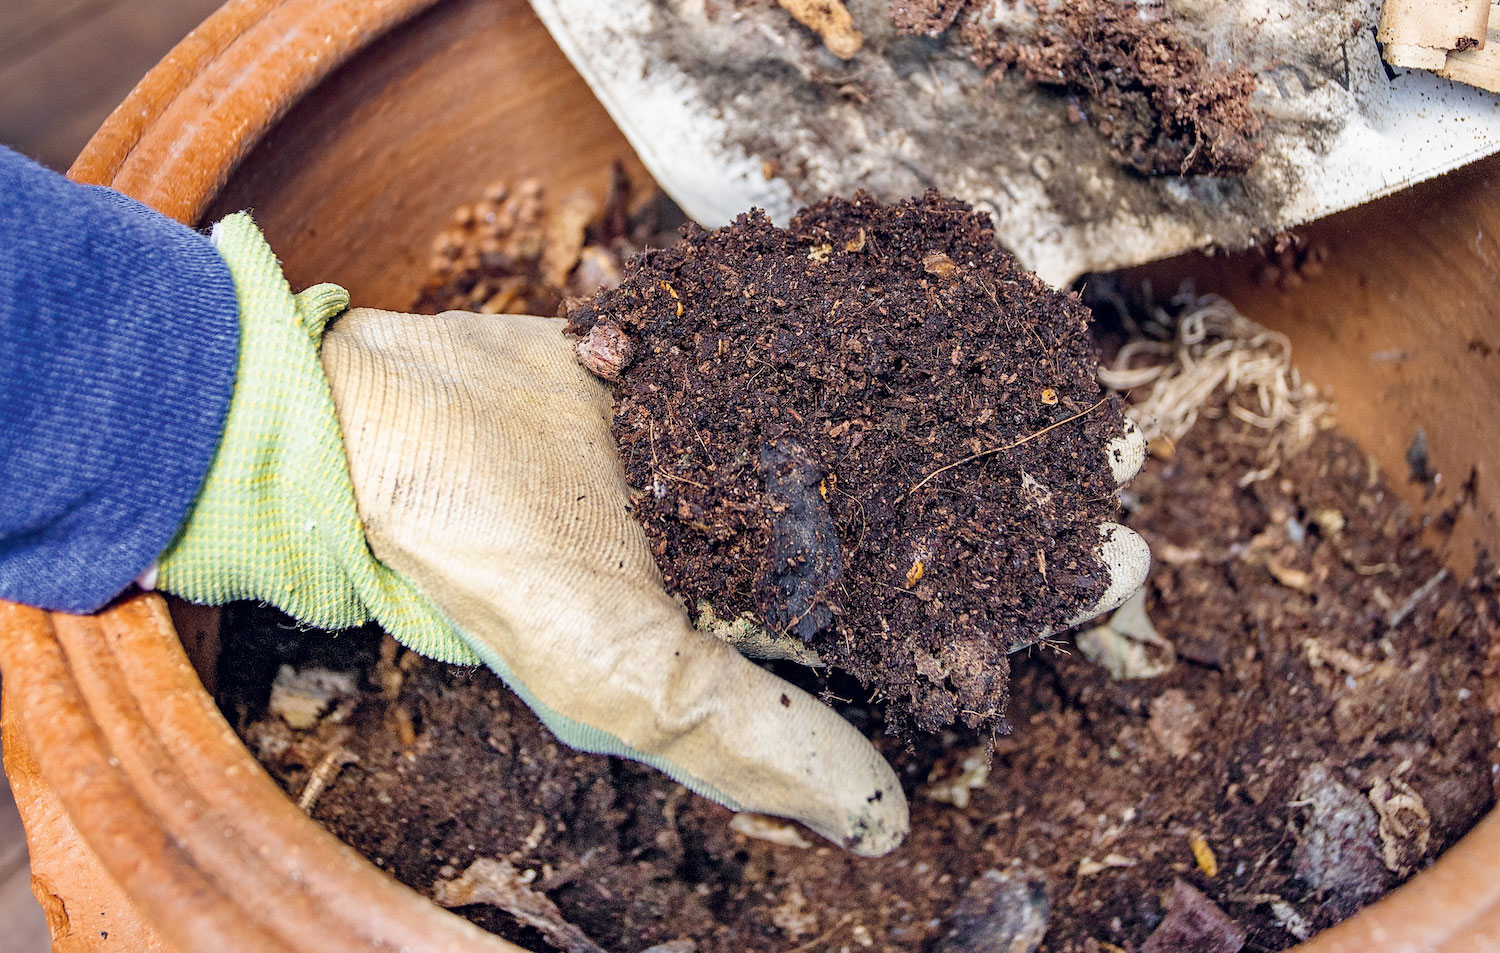
Once you have almost filled the top pot, use a tool or a gloved hand to stir the material. You want a few inches of open air above the scraps. If the material is dry you can add a little water, or if it is wet, add some cocopeat. Then move the full container to the spot just above the base and start filling a fresh pot. It took my family of four about 3 weeks to fill a pot.
Once the second pot is full, empty the first pot into the base pot and start all over with the original pot. After that one is full, you can either harvest the material in the base pot or add material from pot two into the base pot. During harvest, screen the material from the base pot to pull out any large items. You should have material ready to harvest in about 2 to 3 months. If you find you fill up pots faster than the system can handle, add another pot.
Terra-Cotta Pot Compostables
What to Add
- Fresh fruit peels and cores
- Fresh vegetable scraps
- Small leaves from house plants
- Coffee grounds and tea leaves
What to Avoid
- Cooked vegetables or grains
- Yard trimmings (except a few leaves)
- Animal manure

Michelle’s DIY guide for the terra-cotta composter is one of several at-home projects and dozens of insights around composting that can be found in her book No Waste Composting. To purchase your own copy and get to composting, buy it from your local bookstore or directly from the publisher. You can follow Michelle on Instagram and Twitter @compostgeek.
This piece is excerpted from ‘No Waste Composting’ by Michell Balz, Copyright © 2021. Photography by Andrea MacFarland. Published by Cool Springs Press, an imprint of The Quarto Group. Reproduced with permission and by arrangement with the author and publisher. All rights reserved.
